Here are several ways to stain a hand woven reed basket. I have gathered these recipes and ideas from a variety of classes, workshops, websites, and books. Where possible, I have given the sources. Before staining a basket, it is recommended that you have given your basket a “haircut” inside and out. Also, any shaping of the basket with water and weights or ties should be done before staining, and the basket should be fully dry so that it absorbs the stain evenly.
Coffee Stain: For a warm red oak or cherry color, dissolve 4 oz. instant coffee in 2 cups hot water. Check color on scrap of reed. Add water to desired saturation. Pour, spray or spoon over basket. Set basket on newspaper until dry. Coffee smell will fade within a week.
Tea Stain: For a light oak colored stain: Method 1: Dissolve 7 tablespoons of instant tea in 1 cup of boiling water. Pour, spray or spoon over basket.
Method 2: Mix 1 jar instant tea and 1 quart of clear ammonia. Additional ammonia can be added to lighten the stain. This stain will not sour or go bad. Note: Because of the ammonia, work outside with this mixture.
Commercial Water Based Wood Stain: NEVER use stain with polyurethane. Choose desired stain color and apply with a brush or spoon over basket. For a custom color stain, mix Minwax® Water-Based Wood Stain with a small amount of craft acrylic paint. The amount and proportions depend on the basket size and color depth desired. Test color and absorbency on scrap materials. Apply to your basket with a foam brush and wipe any excess off. Let dry. Your basket will have a rich even stain color and long lasting beauty. Unused stain can be saved in a sealed jar.
Oil Wood Based Stain: A paint thinner is necessary when using chemical stains. Used alone, oil based wood stains are too thick and will be too dark. Dry reed is like a sponge and will absorb the color rapidly. Dab up and down so that the color will run into the crevices and cracks. Be sure to go over your basket visually so you won’t miss any spots.
Stain Recipe 1: ¼ cup Minwax® (fruitwood), ¾ cup Paint Thinner (Turpentine or Mineral Spirits), 2 T Linseed oil.
Stain Recipe 2: ½ cup Cherry wood Stain, 1 cup Golden Oak Minwax® wood Stain, 1 ½ cup paint thinner (turpentine or mineral spirits) — Mix all together in a glass jar. Apply stain with a foam brush. The golden oak tones down the red of the cherry stain.
Stain Recipe 3: 1 part wood stain to 2 parts mineral spirits. Brush on stain and wipe off any excess. Reapply if a darker color is desired.
Natural Walnut Stain: For a rich deep brown stain Method 1: Place 20 to 25 green walnut hulls in a cloth or nylon bag. The bag needs to be absorbent to permit the hulls to soak. An old pillow case or old pair of stockings will do. Tie bag tightly shut with a piece of rope. Place the bag with hulls in two quarts of water. Let stand for one to two weeks. Or, you can simmer the hulls outdoors on a gas grill for 2 1/2 to 3 hours. The stain can be stored in a tightly closed container or frozen. The hulls can be frozen and used again. Walnut stain will produce a medium brown color.
Walnut Hull Stain:
Method 2: Another method to make walnut stain is to put walnut hulls in household ammonia for about an hour, strain and use. This method should be done in a well ventilated room or outdoors. When the baskets dry, they smell fresh and clean. You can add more ammonia to the used hulls several times before all color is taken out of them. (1/2 cup ammonia to 1 gallon of dye) You can add water if too dark.
Other Hull Stains: Try using pecan hulls for a red/ orange color. Or, Sunflower hulls for gray.
Tobacco:
For a lighter stain that is more of an oak color, use one plug of any kind of chewing tobacco to one quart of household ammonia. Strain mixture to remove tobacco before use. This method should be done in a well ventilated room or outdoors. Scott’s Liquid Gold® Wood Cleaner & Preservative or Liquid Scott’s using a foam brush is especially good to condition the reed in your basket or when a lot of dyed reed is used. Make sure the basket is thoroughly dry before applying 2 thin coats of Liquid Gold to your basket.
Danish Oil Spray Weaver’s Stain: You may purchase cans of weaver stain in several finishes from many weaving supply companies. These contain Danish oil and provide good moisture protection for your basket. Once the can is used, it clogs easily. If your Weavers stain spray clogs, try soaking the head in Peroxide to clear the stoppage.
Dye Wash by Joanna Wood Peter
A wash is a diluted mixture of dye and water. This combination produces a pale tan color. Mix in a 64 ounce plastic container with lid: 1 pkg. dark brown Rit dye, a small amount of gold Rit dye and 64 ounces of boiling water. When ready to “wash” your basket, put 3 parts of the wash mix and five parts of cold water into a spray bottle and spray your basket. Any dye can be mixed following this method to produce a “washed” look. The mixture can be stored in the 64 ounce container in a cool place. {Source: Winter, 1997 newsletter of Westchester Area Basketmaker’s Guild and Twining Times, Winter 1998}
Other Stain Ideas:
For a washed look, try using a small amount of acrylic water base paint and water for dipping or spraying on the basket. When dry, the finished basket can be stained or sprayed with Scott’s Liquid Gold® Wood Cleaner & Preservative. You may also like the primitive look of Chalk Paint or Milk Paint. You can buy chalk paint from your local craft store, and Milk paint recipes are easy to find online. Use a test piece of reed to see the color and stain effects. A gray over stain gives the basket a weathered look. This looks especially nice if you have some dyed blue, green or mauve reed in it. For an interesting look try staining the handle much darker than the basket. Do this by staining the handle first before inserting it in the basket, then stain the basket and handle.
Care for your basket: To maintain your basket, keep it out of sunlight and away from heat sources and exposure to grease or soot. Periodically dust with a feather duster or a dry natural bristle paint brush. For deep cleaning, dampen a white cotton cloth with clean cold water and blot gently; then let basket air dry completely. To retain moisture and prevent your basket from becoming brittle, mist the fibers at least yearly. If the basket is all natural colored with no dyed fibers, you may quickly dunk your dust free basket and allow it to dry. Soaking a basket in water can result in swelling of the fibers, and can contribute to color bleeding, fading and loss of patina.
Stains and Finishes for Baskets
Cathy Sylvester wwwtanglewoodbaskets.com
Here are several ways to stain a hand woven reed basket. I have gathered these recipes and ideas from a variety of classes, workshops, websites, and books. Where possible, I have given the sources. Before staining a basket, it is recommended that you have given your basket a “haircut” inside and out. Also, any shaping of the basket with water and weights or ties should be done before staining, and the basket should be fully dry so that it absorbs the stain evenly.
Coffee Stain: For a warm red oak or cherry color, dissolve 4 oz. instant coffee in 2 cups hot water. Check color on scrap of reed. Add water to desired saturation. Pour, spray or spoon over basket. Set basket on newspaper until dry. Coffee smell will fade within a week.
Tea Stain: For a light oak colored stain: Method 1: Dissolve 7 tablespoons of instant tea in 1 cup of boiling water. Pour, spray or spoon over basket.
Method 2: Mix 1 jar instant tea and 1 quart of clear ammonia. Additional ammonia can be added to lighten the stain. This stain will not sour or go bad. Note: Because of the ammonia, work outside with this mixture.
Commercial Water Based Wood Stain: NEVER use stain with polyurethane. Choose desired stain color and apply with a brush or spoon over basket. For a custom color stain, mix Minwax® Water-Based Wood Stain with a small amount of craft acrylic paint. The amount and proportions depend on the basket size and color depth desired. Test color and absorbency on scrap materials. Apply to your basket with a foam brush and wipe any excess off. Let dry. Your basket will have a rich even stain color and long lasting beauty. Unused stain can be saved in a sealed jar.
Oil Wood Based Stain: A paint thinner is necessary when using chemical stains. Used alone, oil based wood stains are too thick and will be too dark. Dry reed is like a sponge and will absorb the color rapidly. Dab up and down so that the color will run into the crevices and cracks. Be sure to go over your basket visually so you won’t miss any spots.
Stain Recipe 1: ¼ cup Minwax® (fruitwood), ¾ cup Paint Thinner (Turpentine or Mineral Spirits), 2 T Linseed oil.
Stain Recipe 2: ½ cup Cherry wood Stain, 1 cup Golden Oak Minwax® wood Stain, 1 ½ cup paint thinner (turpentine or mineral spirits) — Mix all together in a glass jar. Apply stain with a foam brush. The golden oak tones down the red of the cherry stain.
Stain Recipe 3: 1 part wood stain to 2 parts mineral spirits. Brush on stain and wipe off any excess. Reapply if a darker color is desired.
Natural Walnut Stain: For a rich deep brown stain Method 1: Place 20 to 25 green walnut hulls in a cloth or nylon bag. The bag needs to be absorbent to permit the hulls to soak. An old pillow case or old pair of stockings will do. Tie bag tightly shut with a piece of rope. Place the bag with hulls in two quarts of water. Let stand for one to two weeks. Or, you can simmer the hulls outdoors on a gas grill for 2 1/2 to 3 hours. The stain can be stored in a tightly closed container or frozen. The hulls can be frozen and used again. Walnut stain will produce a medium brown color.
Walnut Hull Stain:
Method 2: Another method to make walnut stain is to put walnut hulls in household ammonia for about an hour, strain and use. This method should be done in a well ventilated room or outdoors. When the baskets dry, they smell fresh and clean. You can add more ammonia to the used hulls several times before all color is taken out of them. (1/2 cup ammonia to 1 gallon of dye) You can add water if too dark.
Other Hull Stains: Try using pecan hulls for a red/ orange color. Or, Sunflower hulls for gray.
Tobacco:
For a lighter stain that is more of an oak color, use one plug of any kind of chewing tobacco to one quart of household ammonia. Strain mixture to remove tobacco before use. This method should be done in a well ventilated room or outdoors. Scott’s Liquid Gold® Wood Cleaner & Preservative or Liquid Scott’s using a foam brush is especially good to condition the reed in your basket or when a lot of dyed reed is used. Make sure the basket is thoroughly dry before applying 2 thin coats of Liquid Gold to your basket.
Danish Oil Spray Weaver’s Stain: You may purchase cans of weaver stain in several finishes from many weaving supply companies. These contain Danish oil and provide good moisture protection for your basket. Once the can is used, it clogs easily. If your Weavers stain spray clogs, try soaking the head in Peroxide to clear the stoppage.
Dye Wash by Joanna Wood Peter
A wash is a diluted mixture of dye and water. This combination produces a pale tan color. Mix in a 64 ounce plastic container with lid: 1 pkg. dark brown Rit dye, a small amount of gold Rit dye and 64 ounces of boiling water. When ready to “wash” your basket, put 3 parts of the wash mix and five parts of cold water into a spray bottle and spray your basket. Any dye can be mixed following this method to produce a “washed” look. The mixture can be stored in the 64 ounce container in a cool place. {Source: Winter, 1997 newsletter of Westchester Area Basketmaker’s Guild and Twining Times, Winter 1998}
Other Stain Ideas:
For a washed look, try using a small amount of acrylic water base paint and water for dipping or spraying on the basket. When dry, the finished basket can be stained or sprayed with Scott’s Liquid Gold® Wood Cleaner & Preservative. You may also like the primitive look of Chalk Paint or Milk Paint. You can buy chalk paint from your local craft store, and Milk paint recipes are easy to find online. Use a test piece of reed to see the color and stain effects. A gray over stain gives the basket a weathered look. This looks especially nice if you have some dyed blue, green or mauve reed in it. For an interesting look try staining the handle much darker than the basket. Do this by staining the handle first before inserting it in the basket, then stain the basket and handle.
Care for your basket: To maintain your basket, keep it out of sunlight and away from heat sources and exposure to grease or soot. Periodically dust with a feather duster or a dry natural bristle paint brush. For deep cleaning, dampen a white cotton cloth with clean cold water and blot gently; then let basket air dry completely. To retain moisture and prevent your basket from becoming brittle, mist the fibers at least yearly. If the basket is all natural colored with no dyed fibers, you may quickly dunk your dust free basket and allow it to dry. Soaking a basket in water can result in swelling of the fibers, and can contribute to color bleeding, fading and loss of patina.
Cathy Sylvester csylvstr@yahoo.com www.tanglewoodbaskets.com


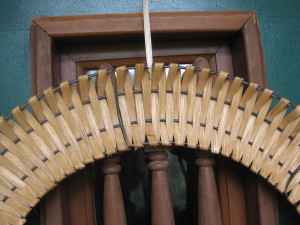
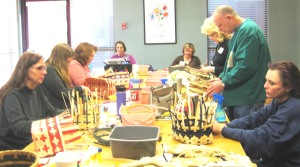 Here are some of my students weaving the Cousin’s Crosses Basket and variations last Saturday, Feb. 17th at Vesper Hall, in Blue Springs, MO. There were 11 students and we had 4 brand new weavers in this class! Great job!


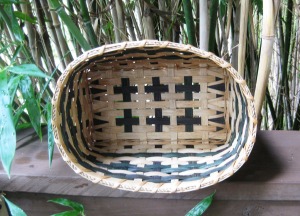
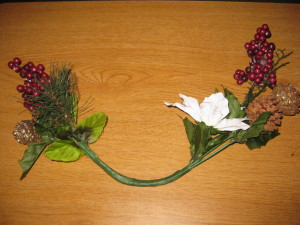
 Pattern adapted from free pattern


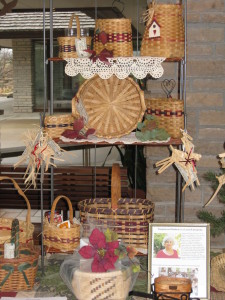
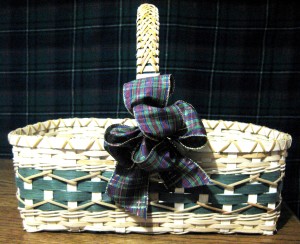
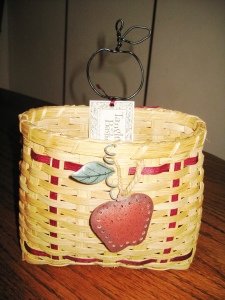 Have you ever wanted to learn how to weave a basket? Students will learn the basics of basket weaving while creating this showy basket with a decorative wire handle. This basket measures 7”X3”X6” below the wire handle. A variety of colors, wire handles, and tie-ons will be offered to personalize your basket. Handles available include trees, flowers, apples, hearts, and more. Students should bring a flat screw driver, an old towel, and a sack lunch as we will not break for lunch. Beginners welcome!
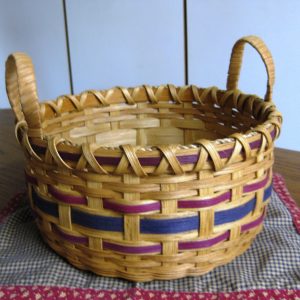
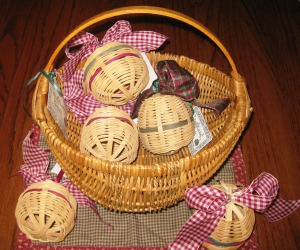
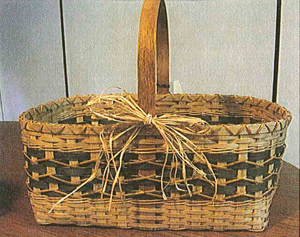 Weave this gorgeous Victorian Market Basket with ornate over-weaving accents. This basket measures 12″ X 8″X12″ including solid oak handle. You will learn how to enhance a simple open weave bottom, over-weave the sides and even receive supplies and instructions for enhancing the handle after the class. There will be a half hour break for lunch. This class is suitable for adv. beginners.